Other email programs also exist, including ELM and PINE on Unix systems, Netscape Communicator on Windows/Mac/Unix systems, and Microsoft Outlook on Windows systems. The departmental Unix servers support ELM and PINE, but we do not currently support Outlook or Outlook Express in the department.
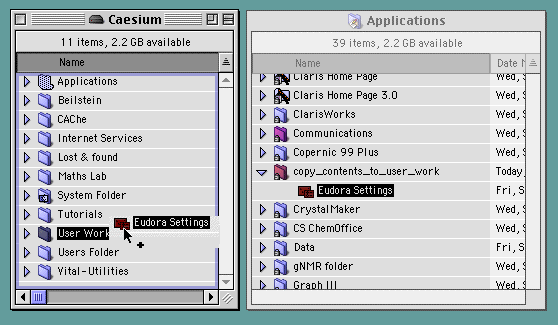
If you wish to take your email settings outside of the departmental teaching machines, you might wish instead to copy not to User Work, but to a floppy disk (or to a ZIP disk for those machines that have one) or finally to a public area called Mac-PC.

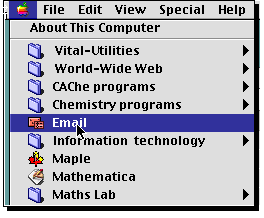
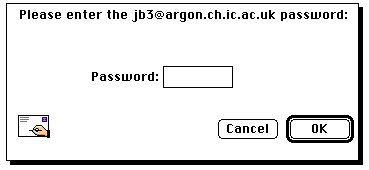
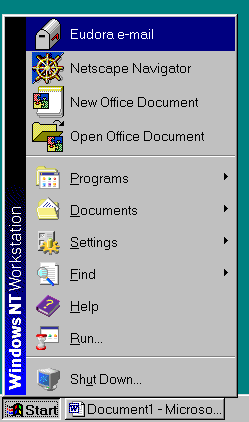
To start the email, invoke the email item in the Apple or Start menus. Press cancel rather than entering a password in response to the next prompt, since the default ident is clearly fictional! Select the settings menu item;
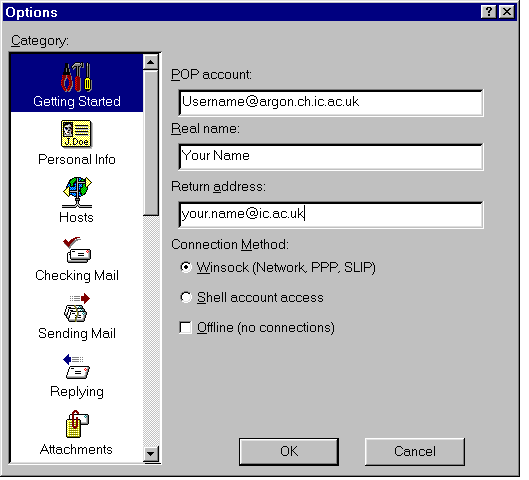
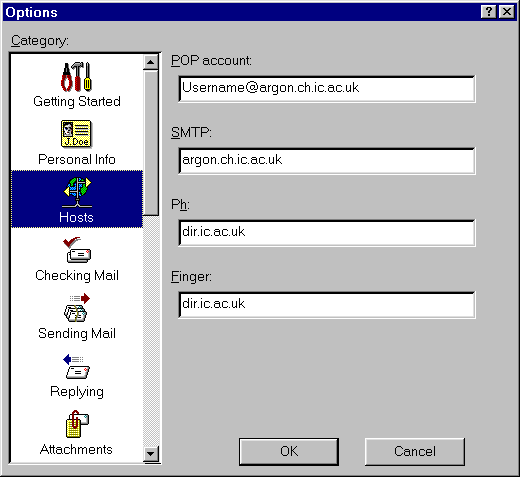
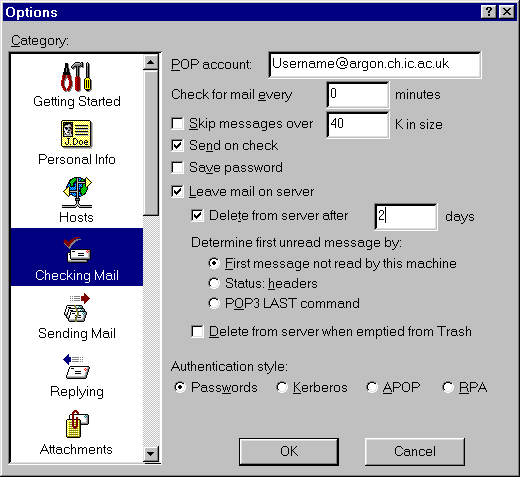
Now you will need to enter your own details;
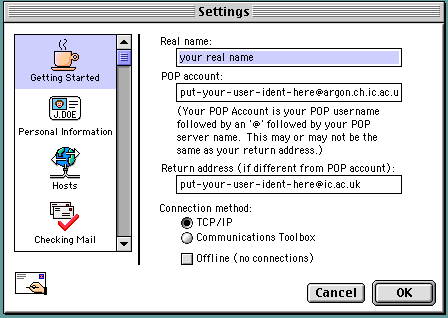
Notice in the above setting the option to leave mail on server for e.g. 5 days. If a disaster befalls you, you will still be able to retrieve messages you have read once already. This option is also useful if you use eg a modem at home to read mail, but want to be able to access a copy at College.
Now log in to the mail machine to transfer your messages;
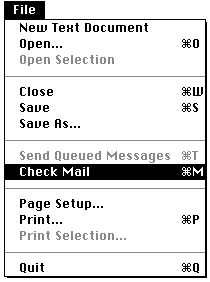
Double click on any highlighted message to read it. You can reply to received messages, or generate your own. You can also enclose documents with messages;
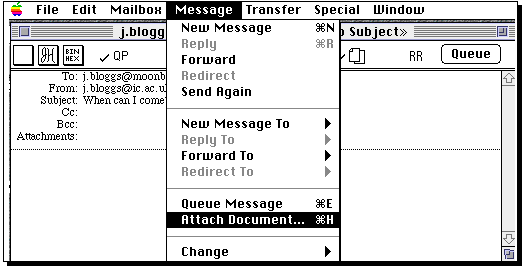
but do not that attachments longer than 4 Mbytes will not succeed. You can set up "Nicknames" for frequently used names and lots of other things. To find out how the program works, switch on Balloon help on the Mac and investigate.
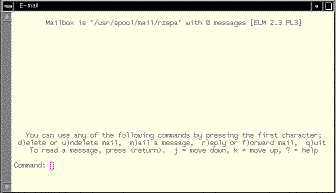
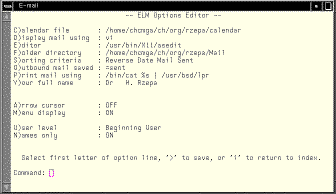
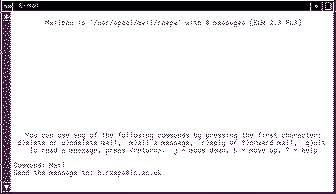
This runs a program called "elm". Unlike Eudora, you do not have to transfer messages to first read them. However, ELM is not quite so "user-friendly". You should configure for the text editor you are going to use to edit mail. The first time you invoke elm, press o and select E. Set the field to /usr/bin/X11/asedit (if you are happy with that editor) and then > and i. This configuration need only be done once. When you request a message to be sent, this editor will be automatically invoked, where you can type your text.
 Using the Windows 95 dial-up feature with the CCS modem service [15.1094] 02 Aug 96

 Using Windows 95 with the CCS Dial-Up service

=============================================

This document covers the basic installation of the Microsoft Dial-Up adapter

and associated network drivers in order to provide a connection on the

CCS Annex server.

Those who only wish to use 16-bit network applications can also use the IC

Trumpet v2.1 distribution. See document 15.1048 in conjunction with

15.1092 for details.


Introduction
------------

This document is quite long due to the rather long-winded process
involved in setting the software up.

You will need your original distribution CD (or disks) so that Windows
can load the software it needs. You will also need to be fairly familiar
with using Windows 95, although I have tried to be as detailed as possible
in these instructions.

This document is written assuming that you currently have no network set
up under 95. If your machine has differing parts of windows 95 installed to
the standard non-networked installation, then the steps needed may alter
slightly. They should still however be applicable in the main.

Please note that the Microsoft Dial-Up adapter will not connect and
disconnect automatically when you wish to use the network. You MUST
connect and disconnect by hand.

I am currently in the process of writing a document detailing how to automate
the login/logout procedure which should appear shortly.
Installing Microsoft Dial-Up networking

---------------------------------------
As standard, Windows 95 does not install the software needed for the
Dial-Up networking. This must be added afterwards.


* From the "Start Menu" choose "Settings" and "Control Panel". Once
the "Control Panel" has come up, double click on "Add/Remove Programs".


* Choose the "Windows Setup" section. Select "Communications" then press
the "Details" button. You must choose the selection box next to "Dial-Up
networking" so that a "tick" appears next to it.


* Choose "OK" to close the list of communications software options and
then "OK" again to close the "Add/Remove Programs" window.


* After a short while, you will get the message: "You must provide a workgroup
and computer names that will identify this compuyter on the network". Click
"OK".


* You will be presented with a window where you can enter this information.
This information will be ignored, for now I suggest you use the following
entries:-

        Computer Name:          Dialin
        Workgroup:              Modems
        Computer Description:   Home PC


The networking protocols installed by default in the above process will
not work over our dial-up service, you must now install the TCP/IP
protocol and remove the incompatible ones.

* Choose the "Configuration" Tab.

* Click "Add...", choose "Protocol" and click "Add...". From the list of
Manufacturers, choose "Microsoft", then from the list of protocols choose
"TCP/IP". Click "OK".

* From the list of networking drivers installed, choose "NetBEUI" and
click "Remove".

* From the list of networking drivers installed, choose "IPX/SPX
compatible protocol" and click "Remove".

* Click "Close" to close the Network control panel. Windows will
install/remove the drivers you have selected, prompting you for the
disk(s) as it needs it. Once finished, you will need to restart your machine.

* From the "Start Menu" choose "Shut Down" and "Restart the Computer". Click
"Yes" to confirm and wait for the system to restart.

* When you machine reboots, you will be prompted to log on to windows. This
is because you have installed networking software. If you do not wish to log
in to use networking, use an arbitrary username and leave the password blank.
In future, you will not be prompted to log in.

Making the new Dial-Up connection
---------------------------------
As set up by default, the Microsoft Dial-Up adapter will not work with
our service. It needs some configuration work to make it do so.

* On the desktop, double click "My Computer", then "Dial-Up networking". This
will bring up the Dial-Up networking connection "Wizard".

* If you have not already set up your modem, you will also be presented with
the "Add/Remove Modem" "Wizard". This is fairly straightforward, and I will
not go into details here.
* For the name of the computer you are dialling, type "Imperial CollegeCCS" and choose
"Next".* For the Area code type "0171", for the Telephone number type "5946999".
Choose your country as "United Kingdom (44)" and click "Next",
followed by "Finish".* Right-Click the new "Imperial College CCS" shortcut,
wait for thepop-up menu to appear and choose "Properties".* Choose "Configure..."
then the "Options" section. Put a tick in thecheck box labelled "Bring up terminal
window after dialling" and click"OK".* Click "Server Type..." and remove the ticks
from the checkboxeslabelled "Log on to Network", "NetBEUI" and "IPX/SPX compatible protocol".*
Choose the "TCP/IP Settings..." button. A window will appear to configurethe dial-up network
TCPIP settings.* Choose the "Specify name server addresses" "radio button". Now  enter
these values into the fields below:     Primary DNS:    155.198.5.3     Secondary DNS:  155.198.5.12*
Leave the Primary and secondary WINS fields blank.* Click "OK" in the TCP/IP settings windows.
Then click "OK" in the next twowindows.

Using the Dial-Up connection
----------------------------*
Double-click on the new shortcut for the "Imperial College CCS". Thiswill bring up a log-on
window where you will be prompted for a usernameand password.* IGNORE the username and password
fields, the authentification will bedone using the terminal window. Click "Connect" and
your modem shoulddial the CCS modem service.* Once it has connected, a terminal screen will
appear. You must log inas if you were going to use the service for basic terminal access.
Once logged in, type "ppp" followed by return.* You will then see lots of odd characters start
appearing in theterminal window. This means that the link is now in PPP mode and istrying to
set up a link to your machine. Press "F7".* The terminal window will close and after a short
while, Windows will showyou a status window while it is connected to the network.
Disconnecting  from the service------------------------------*
Once connected, you can disconnect by
clicking the "Disconnect"button in the connection status window. It is very important
that youdo this, otherwise you will remain connected until you shut your PC down.
=============================================================================
NRNetwork Support 30/11/95Revised 02/08/96.